Hartwood Farm's Suggestions for Successful Seed Starting:
/Happy Spring! ‘Tis the season to start thinking about seed starting for your farm or garden!
Are you thinking about starting a garden? Looking for plants to grow around your house and your yard? This week our blog is all about the keys of growing the healthy, hardy transplants farms and gardens need in places with extra interesting weather like upstate NY. Seed starting is my FAVORITE part of farming, and while we don’t have the greenhouse space to sell our plants to you all directly, we wanted to share how we do it and to encourage you to start some vegetables and flowers of your own!
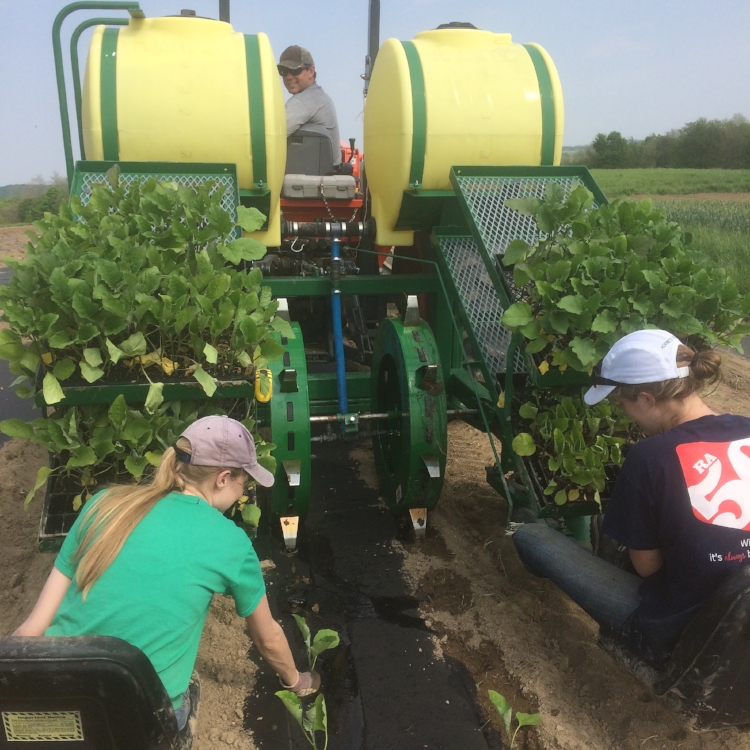
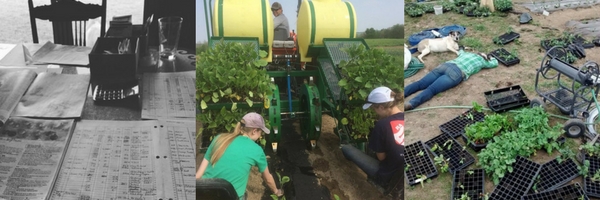
Transplanting eggplant in late May on our (new to us) Waterwheel transplanter... fun!
First off: why start seeds or use transplants when you can just plant seeds straight into the ground?
We transplant virtually every vegetable than can handle it (there are a few crops that don’t like their roots disturbed, like beans, carrots, radishes, turnips, etc, that we direct seed). Why so much transplanting? For a lot of reasons...
First, when you are up at elevation in the northeast, the growing season can be shorter than ideal. In general, when you start seeds inside your house or in the greenhouse, you can cut off ten to fourteen days of their ripening time. A crop like a 120-day winter squash might only need 106 to 110 days to mature if you transplant it, for example. That might not seem like a big difference, but in a summer with an end of May frost and a mid-September frost, those extra ten days can make the difference between getting squash fruit or not!
Second, we are super pinched for space and time in the field (as you likely are too, whether growing for yourself or for market), so it helps us be more efficient if all of the plants in a bed are at the exact perfect spacing and exact same size. When we direct seed, sometimes sections won’t germinate well (we have rough soil, so our germination isn’t perfect in the field), critters might sample things right away, or germination will be too good and the spacing will be too tight. When we transplant crops, we get better germination in the perfect conditions of the greenhouse, and then can make sure everything is perfectly spaced in the field.
Finally, our fields and soils are still a work in progress, and we definitely have a way to go on our quest to control weeds, pests, and diseases in the soil. When we use big, healthy, transplanted crops, they start off weeks ahead of the weeds, and are ideally healthy enough to fight off most disease and pests. Transplanting essentially saves us time on the weeding front during our busiest months of May and June, by having us spend more time in the greenhouse during the quieter months of March and April.
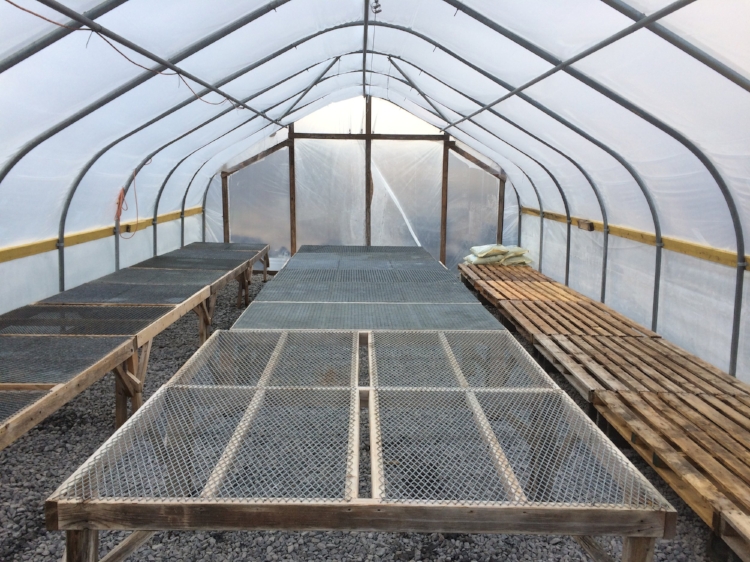
A freshly scrubbed and sanitized greenhouse to start off the season!
Keep it clean!
We focus on cleaning everything that will come near a baby seedling super well before starting for the season. Since we are Certified Naturally Grown, and have made the decision to only use products that are approved for use in organic production systems, it means we don’t have any big (chemical) guns to use on our crops when pests and disease hit. Because of this, our whole goal is to set up growing systems where our plants are healthy, hardy, and free from any funk or bugs before they go into the ground, so we don’t have to deal with problems later. What we are working to prevent by keeping our seed starting area super clean are diseases or pests that might have come onto the farm in last year’s potting soil, last year’s seed, or blown in on the wind to last year’s plants. If your seed starting containers have been camping out in your yard next to your compost bin since you planted last June, definitely give them a good scrub before you start (even if you aren’t interested in organic growing—it’s always easier to prevent problems than rush around trying to deal with them!).
We start off by scrubbing down the greenhouse (or your seed starting area, if you are inside) and then use an organically approved sanitizing spray (basically a rapidly dissipating diluted hydrogen peroxide) to kill any spores or micro-organisms that may have lived through the winter on last season’s trays. It is possible to skip this step if your plant starts are generally healthy, but with so many hungry CSA members relying on us for veggies each year, we prioritize cleanliness, since better safe than sorry!
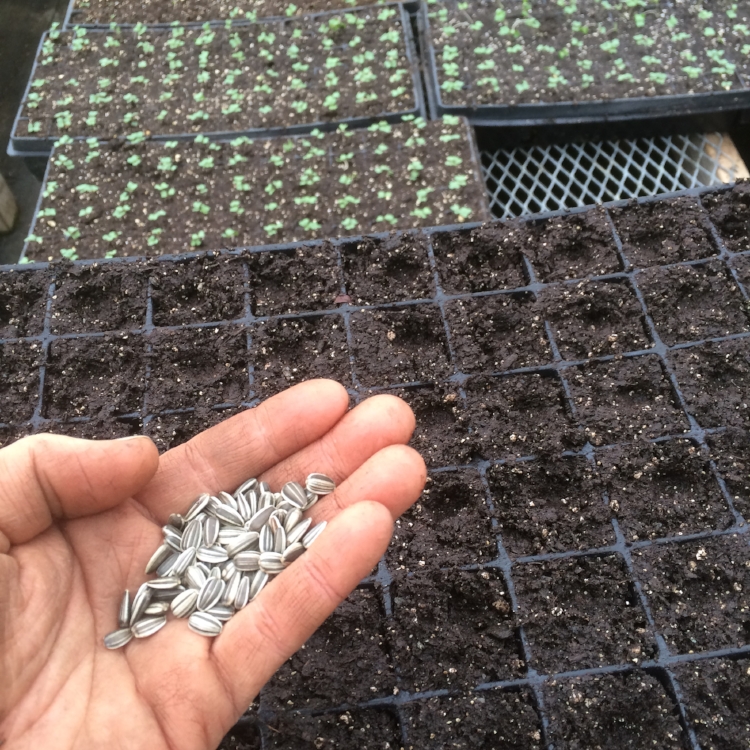
Enjoying the break from minuscule seeds with these nice, big sunflower seeds!
Choose high quality, fresh seeds, and if you are saving your own seed, make sure you are storing them correctly.
Seeds are highly perishable and don’t handle poor storage conditions well. If they are too hot or too damp over the year, it can reduce their viability and make them not germinate or grow as well. As a general rule, try to store seeds in conditions where if you add the temperature and the humidity together, it comes out to less than 100. For instance, if you have your seeds in your house at 68 degrees, you want them to be in an area with low relative humidity (like under 32% humidity). If you have your seeds someplace cool (like in your freezer at 20 degrees), it’s okay if the environment has higher humidity.
Also, be aware of a seed’s general viability, or how long it can be stored. There’s a good chart to help tell you how long a seed can last HERE. Try to use seeds that don’t store well up in the year you buy them (for instance, we never keep onion seed over year to year), and if you do want to save seed to use later, do a quick germination test on them before you plant (here’s directions HERE), because it’s super disappointing to plant bum seed and not have anything grow! Lots of seed companies are starting to sell pelleted seed (seed coated in a clay covering), which is great for planting for those of us with machine seeders or carpal tunnel issues. However, pelleting reduces seed viability, so those seeds need to be used up as fast as possible!
Finally, when starting seeds, choose good seed companies that have high quality products. It takes so much time and energy raising the crops, that it’s really not worth skimping on seed cost, relative to all the other costs farming and gardening has! We are also big fans of buying seed that is bred for our harsher northern conditions, and heavily rely on High Mowing Seeds and Johnny’s Selected Seeds. Fruition Seeds, Fedco Seeds, and the Hudson Valley Seed Library also have nice selections for the northeast.

Getting trays ready to fill with our pre-moistened potting soil.
On a related note, use a good quality potting soil.
In our opinion, this is one of the most important parts of seed starting, since it’s the basis of raising a healthy plant. There are two ways to go on potting soil—either use a sterile (usually peat-based) medium, or use a living compost based medium. We generally prefer compost-based potting mixes, since they should have enough fertility that you don’t need to fertilize your plants and they get the baby plants used to having to pull nutrients from the soil. The down side of compost-based mixes are that they aren’t sterile, and if the person making the compost doesn’t do a good job and uses plants in that compost that had some diseases, the disease-causing micro-organisms can transfer to your baby seeds. Compost based mixes also take a lot more skill to water correctly, which can be challenging for new growers (more on that later). Sterile mixes are good because they tend to have lots of water holding capacity with all the peat moss in them, but the only fertility or nutrients they have for your baby plants come through whatever fertilizer is added to them.
Finding a good potting mix can be hard. We actually order ours in bulk from the Hudson Valley or Vermont, and it’s one of the biggest costs of our farm operation in spring. Some folks make their own (there's a mix of recipes HERE), and we’ve done it in the past with some success, but find that the commercial mixes are so much better than anything we make, so we have settled on letting the pros do it for us. Big box stores often just have super-chemically mixes (look on the labels to see if they have Miracle Gro in them), but you should have luck finding small bags of good quality potting mixes at local nurseries, greenhouses, or hydroponics retailers.

Heat and moisture trapping germination domes taken off for the day (so we don't cook the plants). Make sure you don't stack the domes in a pile in the sun or they will fuse together!
Water!
Water management of seedlings is one of the most critical things to their growth, and also one of the hardest tasks to do correctly. Seeds need adequate moisture to germinate well, but if they are too wet, it can lead to tons of disease, including damping off, which is the bane of many a seed starter.
We mix water in with our potting soil so that when we start the seeds, the soil is already quite wet, so we don’t need to water for a few days. Then, we focus on keeping the top of the soil moist (germination domes or covering with saran wrap can help with this), but not really watering the whole tray deeply, because too much water at this stage can leach out the nutrients in the soil that those babies are going to need later. We generally use a mister at this stage, checking and re-misting several times a day.
Once the seeds start to germinate and grow, you want to water deeply enough that they have plenty of water so they can grow vigorously, but not so much water that their roots don’t have to reach out and form healthy root systems, or that you are leaching out nutrients. This is actually a really hard balancing act, and you will have to play around with your systems to see what works best for you and for your potting soil and starting setup.
In general, as they plants grow bigger they are going to need more water (or if you see any visible wilting starting). But if you see plants keeling over and looking like their stem was pinched off (this is damping off, caused by the combination of soil funk and over-watering, and fatal for the plant that gets it), or getting weird and yellow looking, it could be an indicator of over watering, and you should water less, and get some airflow in on the affected plants. If you water from the bottom, one good watering a day should be good. If you water from the top, make sure you are getting the water in deeply by going over the trays a few times each watering.
Finally, we try to water either early in the day, or mid-afternoon at the latest, so that by nightfall, the leaves are dry. Wet leaves are a good breeding ground for plant funk, so try to time your watering to minimize leaf wetness.

Our new germination chamber! It's heated by a crock-pot and mini-heater, runs about 83 degrees, and holds 64 flats at a time!
Temperature and Light
Each crop has a preferred temperature range to germinate and grow in. In general, we use higher temperatures to help seeds germinate faster (though some crops like lettuce only germinate at cooler temperatures), and cooler temperatures to grow out those germinated plants in (so they are tough and ready for our harsh field conditions!). You can increase temperatures for your seedlings through germinating them over a heating duct, using little heaters, making germination boxes (we have a fancy one, but you can also use something as simple as a cooler with a light bulb), and commercial heating mats. If you are limited for space and heat, focus it all on crops like your peppers, eggplant, and tomatoes, that really need warm soil to start growing.
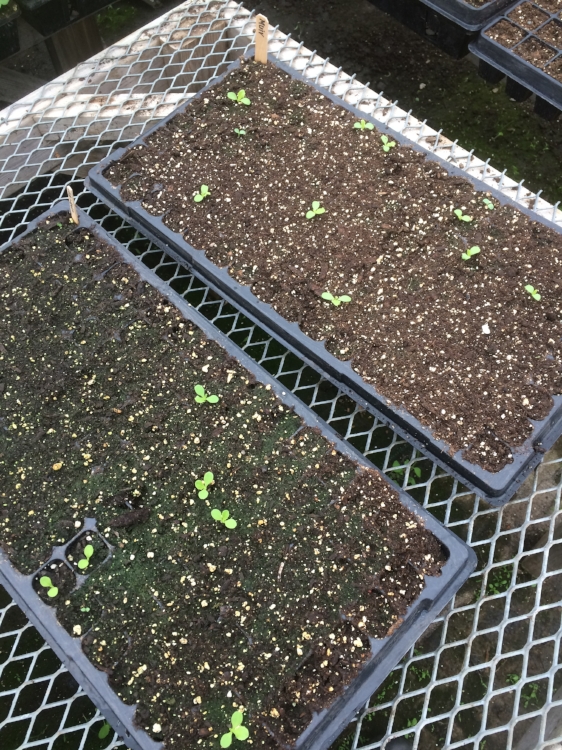
On the light front, some things, especially lots of herbs and flowers, need light to germinate, so you will want to read the directions on your seed packs. Most vegetables want to be shallowly covered by soil (to a depth of 1 to 3 times their width, max) and can take or leave the light. However, once the plants start to germinate—like the second they start poking out of the soil—they need to have light, or they will get all long and stretched out and weird. Plants that get “leggy,” where they are reaching out and forming long stems to get to the light, will never really grow as well as stocky, shorter plants.
Ideally, you have a greenhouse with full sun to start seedlings in. But if you don’t, you can replicate one with a super sunny south facing windowsill, or using florescent or other sort of grow lights (sometimes you can find decent lights on Craigslist). If you use fluorescents, they only work correctly when they are suspended within 3 to 6 inches above the plants—any higher, they lead to sad, leggy plants.
One challenge here in CNY, even if you have a fancy greenhouse, is when the Mordor-like gloom descends just as all your baby seeds germinate. We’ve had problems even in the greenhouse with seedlings getting too leggy, especially brassica crops like broccoli, cauliflower, and kale, when they germinate before a spell of cloudy days. So even greenhouse seed starters might want to consider lights or keep an eye on the weather.
If you do have leggy, elongated plant stems, you can try to toughen them up by exposing them to more light and a bit of wind, but with the exception of tomatoes (which can be replanted deep, covering up that long stem), they will never be as good as stockier plants.
One final word of warning—make sure that you don’t cook your seedlings! If you are using plastic, germination domes, or even a greenhouse, and it gets sunny, you need to get out there and uncover your plants fast, or the soil can heat up and fry the seeds/seedlings. We figure we have 5 minutes once the sun comes out to remove all the germination domes before the soil reaches scorching temperatures, so if we are leaving the farm on a cloudy day, we preemptively take off the domes, just in case the sun shows up!
Problems! (This was actually from a lot of bad seed...)
Know your plant pests and diseases and monitor your seedlings
It’s helpful to think about what problems you’ve had in the past on your seedlings, and examine them daily to make sure you aren’t getting any new problems. The things we see most in our greenhouse are fungus gnats, rodent damage, and issues stemming from excessively hard water. The problems I see a lot off the farm include damping off, excessive watering, aphids, and leggy-ness. Most of these are solvable challenges through switching management.
At the first sign of an issue, inspect your seedlings closely:
- Leggy seedlings show that your light is too far away and you should get more light on the crops (and consider replanting, if there is time as super leggy plants won't be productive).
- Damping off, when perfectly good looking seedlings keel over, is from over watering and too much moisture. Try to get ventilation on the plants and reassess how you are watering. Damped off plants are dead, so you want to focus your efforts on saving the survivors in the tray.
- Lots of missing plant tops likely comes from rodents, so you will want to find out where they are coming from and set out some traps. You may need to move your plants as well, since once they know where a food source is, they keep coming back. Germination domes can keep out the wimpier rodents for a short time.
- Fungus gnats can come in if you are using compost based potting soil, and flourish in damp, wet areas. If you see small black flies buzzing around your plants, it could be them. On their own, they aren’t too bad of a pest, but they can spread disease around the plants. Try to remove sources of moisture and dry out your seed starting area.
- Aphids can overwinter in greenhouses that have constant plant cover, or come in on purchased plants. They tend to gather in the growing points of seedlings and make the new growth look weird. They can be washed off the plants with vigorous watering, and organically-approved insecticidal soaps can also help deter them. Bought-in ladybugs do eat them, but take some time to impact the population, so they serve as more of a preventative measure than a cure.
- Too much water is probably the thing I see most on folks’ seedlings, with the signs being damping off, lots of moss growth on the soil, and yellowing foliage, as the soil is so waterlogged it’s starving the plants of nutrients. When you water the seedlings well, the trays should become really heavy. You should try to let them become fairly light (maybe half as heavy) before watering again (though not to the point of making the plants sad or wilty). Get in the habit of feeling the weight of your trays and water based on weight, not on a particular time window. Especially here in cloudy upstate, seedlings might not need water every day.
- Hard water is the final issue we struggle with, given our super alkaline, limestone-y water. There are some organic additives that can increase the acid in your water, but this shouldn’t be a problem on a home garden scale. One exception is that if you are starting seeds in mid-summer for fall crops, you might see more yellowing and slower growth than in the spring, since the hard water is more of an issue in warmer conditions. We usually try to get our seedlings in the ground faster in the summer, before this becomes a problem.
A final note, if you are buying seedlings, you want to give them a good once over, looking for any foliar issues (are there spots on the leaves? Leaves with yellowing or curling? Odd colors), seeing if there are any bugs or funk visible, and just looking for overall good plant health. The seedlings should be a nice bright green, have thick, sturdy stems, and not be too stretched out. In general, locally grown seedlings available at farmers markets or in local nurseries and greenhouses are a LOT healthier than the bulk of the plants available at some of the big box stores, since most of the local places are professional growers keeping an eye on their seedlings and making sure any with disease or funk are culled out.
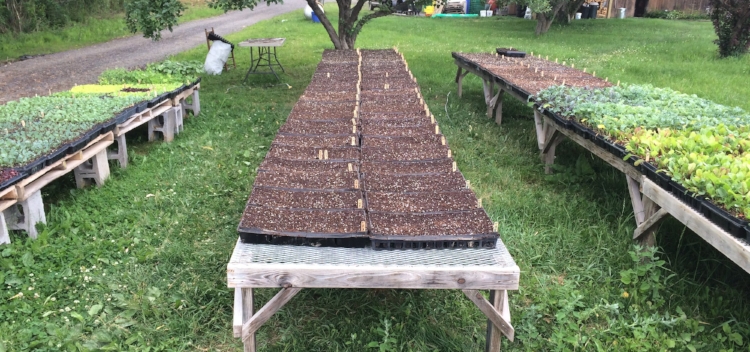
Our hardening off area, it's protected and partially shady to gradually toughen up the babies.
Harden those bad boys off
Once you have all these beautiful seedlings ready to be planted, the last stage of getting them ready for planting is called “hardening off.” What it essentially means is toughening up the babies to be able to handle the transition to going outside. Plants grown inside are protected from harsh light, winds, chill, and heat, and pampered with all the water and nutrients they need. If you move a plant straight from your indoor growing area to the ground, being hit with the stress of all those things at one time can shock it so much that it dies.
Hardening off means you gradually start exposing the seedlings to stresses, either through reducing water for a few days, moving outside to the wind and sun in gradually longer increments of time, or reducing temperature. In an ideal world, you’d move the trays outside for a few hours, then back inside, and repeat this over a week, for a longer outside interval each time. In our non-ideal world, we generally harden plants off for a few days this way, while reducing their water. We sometimes cheat on this process and time our transplanting of the crops for grey, cloudy periods, so they aren’t getting stressed by the sun after planting.
Sturdy seedlings can generally handle a few of the stresses of a rapid move outside, but you want to make sure they don’t get hit by all of them at one time. Try to avoid transplanting near a hot, dry, windy spell to lesson the shock on your babies, and make sure that you give your transplants some extra TLC that first week after they are in the ground!
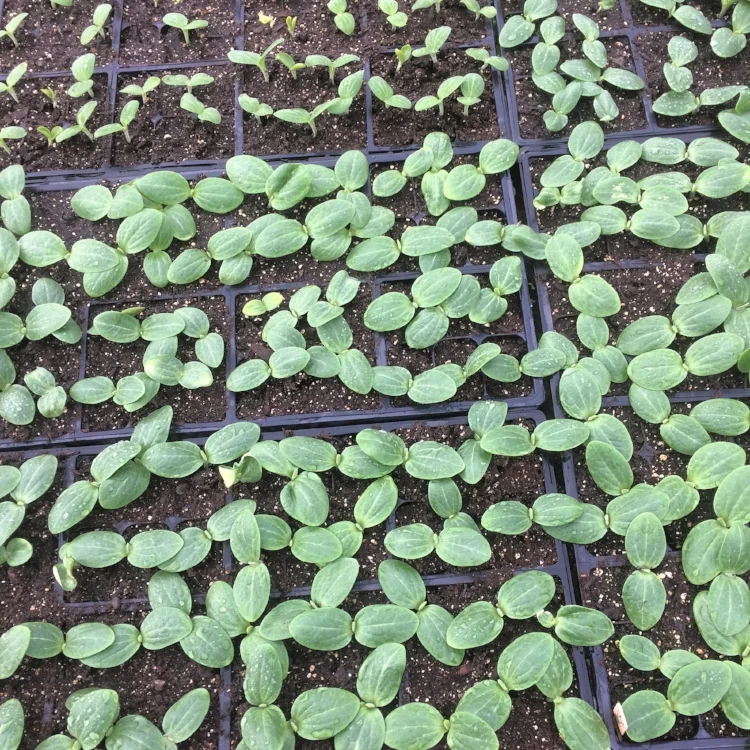
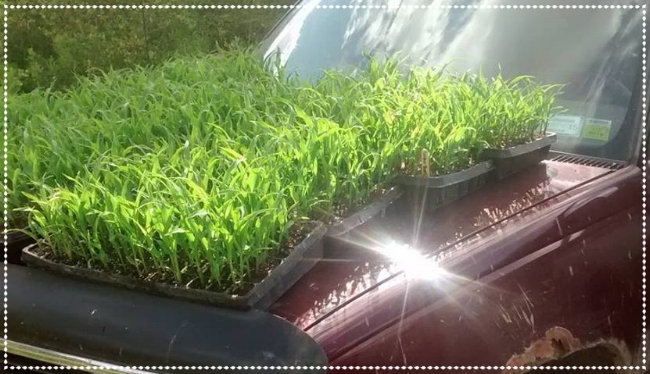
One week old squash in late May, halfway ready to transplant!
DON’T JUMP THE GUN!
This time of year, gardeners and farmers alike are itching to get their hands dirty, we totally understand. But one of the WORST things you can do in seed starting is starting those babies too early. Rushing seed starting doesn’t pay off most of the time (unless you are a commercial farmer who really needs to have the first of a crop to market to make the extra premium those veggies entail), because younger, healthy transplants survive and grow so much better than older, root bound ones.
The best way to not start to early is to do a little math on your veggies. For instance, it stresses me out to see everyone starting their tomatoes in February in the northeast when they aren’t going into a greenhouse. If you want to plant tomatoes outside on Memorial Day weekend (a traditional and pretty good start date), count back and see what date is best to start them inside. For instance, we grow our field tomatoes in 48 cell flats, which means in a standard flat, there are 48 plants, which is a pretty standard size for plants you might buy from a greenhouse. I want a healthy, vigorous tomato seedling, that’s ready to burst out in growth, which takes about five weeks of growing in the greenhouse, or maybe six weeks, max, if I want to try and push to get it in the ground a little before Memorial Day. Counting back, that means I should start my outside tomatoes no earlier than April 16th this year. If you are growing them in a bigger pot, like a quart yogurt container, *maybe* you could start them at the beginning of April. But starting a tomato before that can actually set it back and reduce your future harvests, since it will likely get so big and rootbound that it grows poorly.
9 times out of 10, we’ve had so much better growth using smaller transplants than bigger ones. So if you haven’t started your seeds yet, DON'T WORRY, you still have plenty of time! We have only just fired up our greenhouse, and start most of our hardy crops (to transplant out late April/early May) the last week of March. We start our tomatoes for the field mid-April, and longer season tender stuff like eggplants and peppers late in March. Super fast seedlings like cucumbers and squash, we actually only have 2 weeks (or 3 weeks max) in their cells, so we don’t even think about getting them going until May. So don’t worry, you still have plenty of time to plan for and plant your seedlings. Happy growing!