

How a Tractor Works
/In our little blog series on tools, we realized that we should start at the beginning and cover the main tool we turn to on the farm: the tractor!
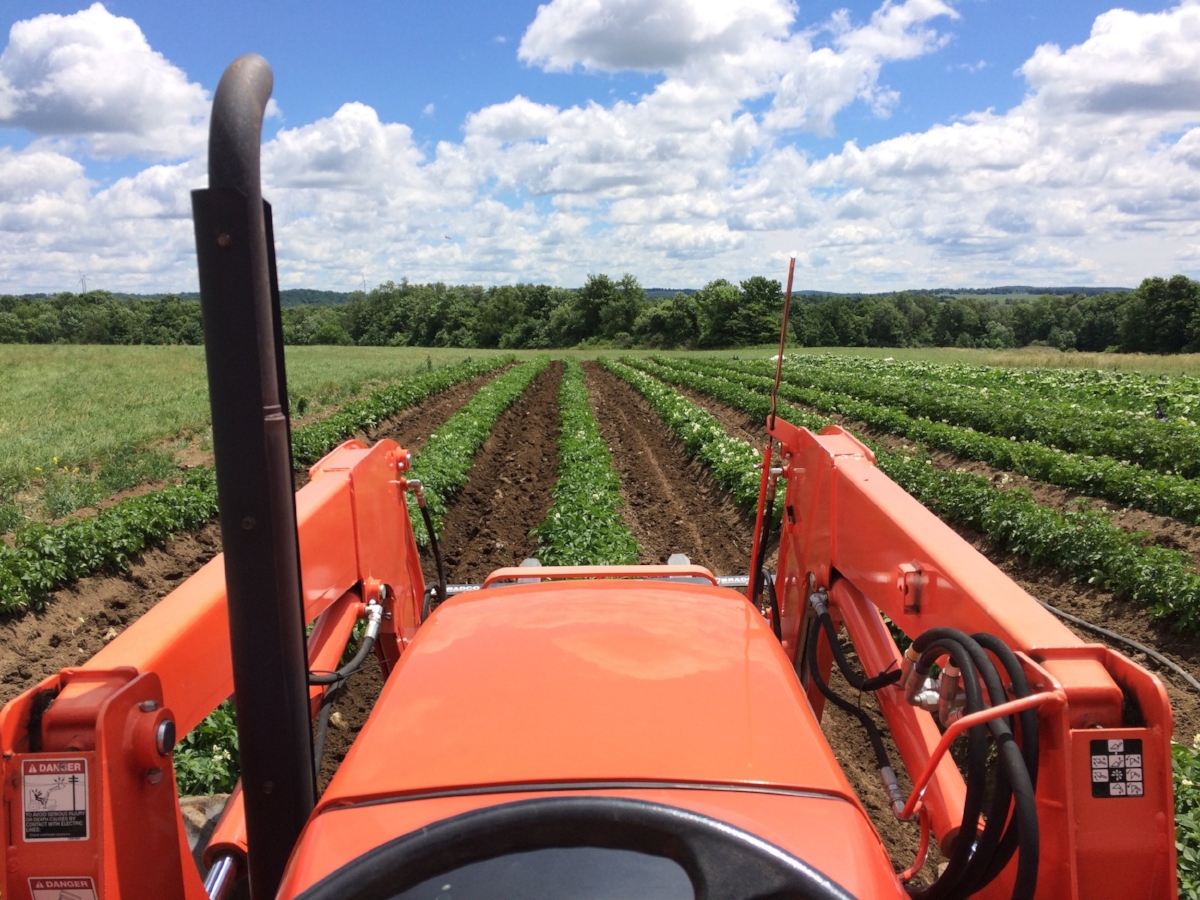
The view from our desk (over last year's potato field)!
The tractor is best viewed as a mobile power source. On its own, it doesn’t really *do* anything, but rather is a big engine that can run all sorts of tools that do actually do things. Tractors can usually attach to tools (or "implements") on their front and back ends, with a few adding some middle attachments.
On the front end, you’ll commonly see us driving around with either a bucket loader that we can fill with stuff or scoop up stuff to move things around, or with a set of forklifts which we also use to move stuff around or as a platform to mount other tools on. In fancier tractors, you could have an additional set of front hydraulics, which would let you run a wider range of equipment from the front end. (In retrospect, we regret not going with this option when we bought our tractor since it would let us run two implements at one time, saving a lot of tractor time and fuel!). We also started using the forks to mount our new spreader for the organic chicken compost we use, so that we can spread as we are tilling, which saves a tractor trip around the field and reduces compaction.
Using the forks on the front to move things around!
Some tractors, like the old-school tractor that mostly hangs out in our yard, can mount equipment in the middle, like garden tractors have mid-mount mowers. This is a nice option for using tractors to cultivate crops because it gives you a really good view of what you are doing.
The back end of the tractor is really the business end. Different implements hook up to either the drawbar hitch of the tractor (a hitch that sticks out basically like one on a truck) or to the “three-point hitch” (or 3pt) of the tractor. The drawbar hitch hooks up to things that we simply drag around the fields, like the chicken house or the disk harrow. The three-point hitch has three connection points, which allows the tractor to raise and lower the attached implement. Most of the equipment we have attaches this way, which is best on a vegetable farm, since we grow in long growing beds that end on grassy walkways and we want to be able to raise up any equipment on the tractor so it doesn’t tear up these farm roads.
This is looking down at the back side of the tractor--the drawbar hitch is not in use (in the center), but the seeder is hooked up to the three points of the 3pt. The yellow shaft is the spinning PTO (more on that later).
Some equipment like the plows or our new field conditioner just hook up to the 3pt and are used by being raised or lowered into the soil where they are then pulled along by the tractor. Other equipment relies on the two other things that live on the business end of the tractor: the hydraulics and the PTO. The hydraulics can hook up to the hydraulic system of an implement and provide additional motion or power. For instance, our disk harrow is just drawn around by the tractor drawbar hitch, which can’t raise or lower it, but it has hydraulics that run a set of wheels. From the tractor seat, we can pull a lever to activate the wheels, which raises the super heavy disk off the ground so it doesn’t tear up the grass.
The view from the seat of the heavy disk--you can see how without the hydraulic run wheels to lift it up, it would tear up the grass!
The PTO, or power take-off, is the most business-meaning part of the tractor. It’s a grooved attachment point that when activated, starts spinning the shaft of whatever implement is hooked up to it at a super high RPM rate. Most PTO driven tools attach to the 3pt and thus can be raised and lowered as well as turned on and off. The roto-tiller is probably the best example of such an implement. To use it we position the tractor straddling the bed, engage the PTO as we start driving, and then lower the tiller into the ground to the desired depth. It takes a bit of coordination and timing to run most of these implements, as well as an ability to simultaneously look backwards and forwards, make throttle and depth adjustments, and drive in a straight line. The PTO is also the one really dangerous thing on the tractor—we have bright yellow shields on them for added protection, and make sure anyone near the tractor has fitted clothes and their hair contained so nothing can get sucked in.
Operating the roto-tiller (on last year's super dry soil!)
And that’s how tractors work! Most have two or three gear ranges, with 4 or 5 speeds in each. Our tractor can run from 1/10th of a mile an hour up to 20 mph on the road [Matt tried to debate me on this, saying he never breaks 13mph on the road. However, when I drove it down to town, I held at a steady 19.5mph, so I’m declaring myself the race winner!]. Farms of our size generally have 25 to 70 hp tractors (ours is 55hp), and given all the mud we get, 4wd is definitely helpful.
For the most part, they are easy to drive, especially if you can drive standard transmission. The thing that takes practice is getting the path straight, which you are constantly looking around and making throttle and speed adjustments. Some of the easier things newbie drivers can practice on are moving materials around the field, spreading compost or picking up rocks, and mowing. More challenging tasks include anything where a straight line is paramount, especially things like tilling in a single bed between two planted beds that we are still growing on!
Plowing up a new field!